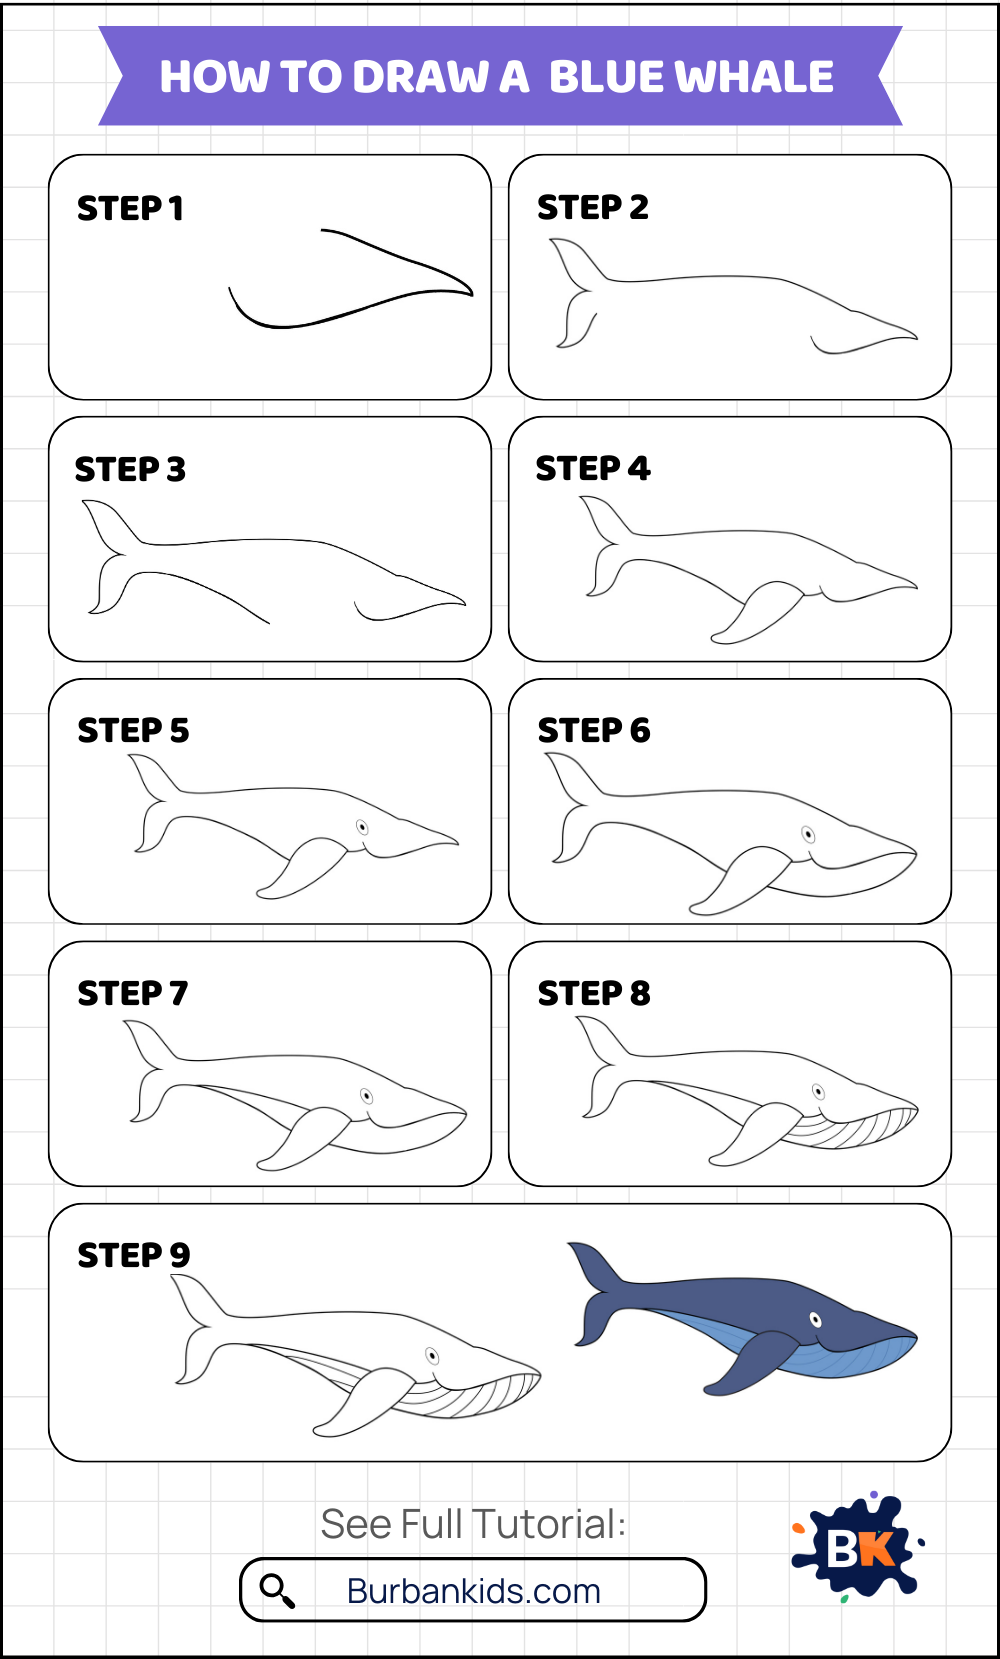
Hello, young artists! Today, we’re going to draw a magnificent Blue Whale. Whether you’ve seen these majestic creatures in books or documentaries, we’re going to capture their impressive size and beauty on paper.
Follow my easy steps, grab your drawing supplies, and let’s create our own stunning Blue Whale artwork together! 🐋
How to Draw a Blue Whale
Step 1:
Begin by drawing a leaf shape to create the mouth of the blue whale.

Step 2:
Extend the curve into a sleek, streamlined body, tapering towards the tail.

Step 3:
Sketch out the tail flukes, with a split in the center, making sure they’re proportionate to the body.

Step 4:
Add a flipper near the front of the body, with a gentle curve for a natural look.

Step 5:
Include the whale’s eye, small and situated just above the mouth line near the front of the head.

Step 6:
Now, draw a line that starts from the mouth and continues to the flipper.

Step 7:
Draw a curved line as shown in the picture, starting from the flipper and extending to the tail.

Step 8:
Add details to the body for texture, like the throat grooves that run from the underside of the mouth along the bottom of the whale’s body.

Step 9:
Add details to the blue whale body as shown in the picture.

Step 10:
Color your whale, typically in shades of blue, with a lighter underside.

conclusion
Diving into “How to Draw a Blue Whale” has been a whale of a time! Did they capture the majestic size and unique features of this magnificent marine mammal, or have you swimming with artistic delight?
Share your feedback. Your insights help our drawing guide stay as impressive and captivating as the blue whale itself, with steps that make the creative process a splashy success! 🐋


I’m a former teacher (and mother of Two Childs) with a background in child development. Here to help you with play-based learning activities for kids. ( Check my Next startup Cledemy.Com)
